Still Developing

" A lot of my enjoyment of photography comes from learning. This is typically done through talking with others, reading books, magazine articles, blogs, etc. Part of the balance of having so much good information available (especially the writings that people make available for free online) is to contribute back by writing anything that I learn or experience. If you get something out of this great. If you care to comment to correct my many mistakes, I would greatly appreciate it. Landscape photography can be a lonely occupation but the conversations we have more than make up for that. "

Sunday
3 February 2008
No Comments

Water in between Fresnel and Glass


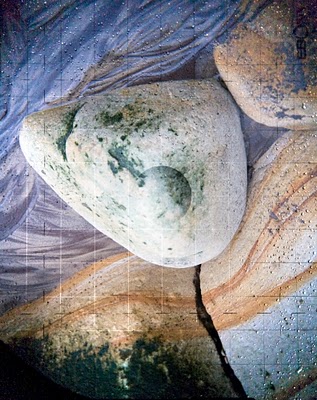
This post is in way of a reassurance for people who may end up in a similar situation. Whilst taking photographs in Whitby recently, the conditions were very wet. Not only was it raining but the humidity was really high. All of this meant that my ground glass was getting covered in condensation (as evidenced by the main picture!) at one point, however, I started to get worried that the my ground glass was broken. The bottom left corner of it was completely black. Once I’d figured out it was water (by looking at the corner from an angle as the water had made the ground glass completely transparent) I then wondered if it would do any permanent damage.

Fortunately I was reassured by a friend (thanks Mel) that you can unscrew the back of the glass and let the fresnel and glass dry out (don’t rub the fresnel if you can help it though, let it air dry). So there you go…

Click to view full post including No Comments
Sunday
3 February 2008
1 Comment

Polaroid Portraits

I was playing around with the polaroid a little more this weekend with a flower photo and two family photos. The flower was taken under tungsten and was insistently yellow. The two portraits were taken indoors but with natural lighting. The exposures were in the 1/40 second range and the temperature was average indoor.. The colour of the exposures was still yellowy. I’m going to try taking some shots in daylight (possibly shaded) to see how they turn out. I have the feeling the naturally cool daylight will balance the naturally yellow polaroid.. We’ll see.

Click to view full post including 1 Comment
Thursday
31 January 2008
3 Comments

Influence, Serendipity and Plagiarism


In a comment in a previous post, an interesting point was raised about the influences a photographer brings to bear on their subjects and how to create a style that transcends these influences.

Charles mentions the Whitby shot three posts previous to this and suggests that it is David Ward-ish and also asks the corollary of this which is, is it Tim Parkin-ish.

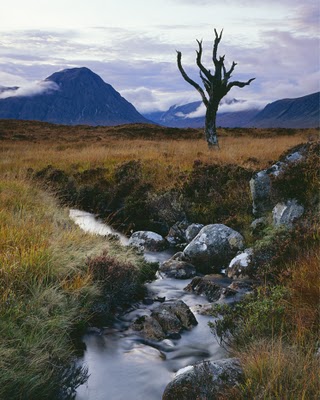
First of all I’m very happy to have my photography compared to David, he is someone whose photography I find inspiring, interesting and rewarding. I’ve also been developing David’s website and so have been working closely with his images for some time. I imagine this can’t help but have an influence, even sub-consciously. An example of this influence would be the photograph of the dead tree on Rannoch Moor that I’ve recently uploaded to Flickr.

This photograph was taken without once thinking about David’s own iconic picture (which I believe will grace the front of his new book) and it’s also not a patch on David’s picture (the snow on the mountains, the beautiful fluffy clouds, the strong leading line through use of wide angle). In this location however, I believe there are only a few different obvious and strong ‘vista’ shots. The location of the stream and the fact that the background is strongest in this direction plus the boulders and plants, both adding detail and colour. Finally, the views in the other directions just aren’t as interesting. The main thing I don’t like about David’s shot is the blocky scan of it I’ve seen (the amazon cover doesn’t look much better at the minute).

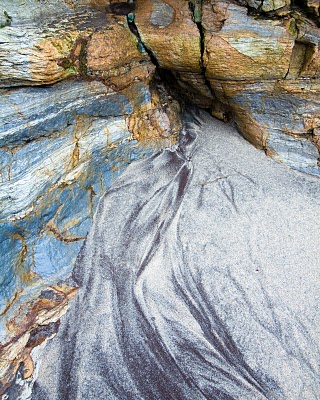
Then again this isn’t a particularly David Ward picture in my opinion. The picture that Charles mentions is a lot more reminiscent of the types of picture that I identify David with. It has strong graphic lines and shapes, it makes good use of texture, it ‘connotes more than it denotes’ (in this case I’d hope to say something about flow and time). But, again, I wasn’t thinking about David Ward when I was taking this. If anything, I was thinking about Nigel Halliwell and Mel Foster, both of whom who know David and are probably inspired by him. Does this mean I’m inspired y David second hand in this case.

But what about the photographers who inspired David? Do David’s pictures look David Ward-ish or is there some photographer out there with whom David has a strong link. People talk about a “Joe Cornish” look but they fail to see through Joe through to his influences (Peter Dombrovskis, Eliot Porter, Michael Fatali).

I believe we have in britain a zeitgeist embodied by certain high profile photographers. This has led to an easy (and lazy) categorisation of anything without a horizon as being Ward-ish, anything rustic (and square) as being Waite-ish, anything Vista-ish with strong near-far compositions as being Cornish-ish.

It is difficult as there aren’t many books tracing the history of Landscape photography through it’s influences and people like Eliot Porter get missed completely by a lot of people (my included).

In hindsight, we can see a photographers body of work and understand a ‘style’ as being implicit in everything they did. But if you ask that photographer about their artwork, they will show you picture after picture that denies that style; pictures that demonstrate a talent far away from the charicature developed in the media.

Now how difficult is it for me to have a developed style and to demonstrate it in a single picture.

I ask you to look at the following pictures and tell me if they fit their photographers charicature..

You can identify the original photographer by their aspect ratio if you like – does this mean that these photographers style’s are so closely linked with something as trivial as picture shape?

Because I’ve realised that the only way to really let my style show through is to work on a limited body of subject matter until I’ve exhausted sub-conscious influence and have to start thinking myself about composition, style, topic, etc. In other words, entering a gestalt state of perception and then working back to my visual metaphors (probably having to create them on the way back).

Charles also asks a few other questions:-

Do you feel it is your duty or plainly unavoidable to make pictures that someone else (eg David Ward) might have made?

It’s totally unavoidable that I might make pictures that someone else might have made. It’s less likely that this will happen if I have built my own ‘recipe’ for a photograph to taste nice to me. This recipe might well contain ingredients from other photographers (who may have inherited these ingredients from still other photographers. Some ingredients I will find myself along the way.

I wonder if David Ward worried about this photograph being ‘Sugimoto-ish’ (or even ‘Gustav Le Gray-ish’)

Charles also asks a few final questions: –

Do you feel that your originality lies in the fact that you are the one who has found this material? In other words, do you think that the location will give greater originality than the rendition?

No but I do believe that working around an original location will more likely allow you to express what your style is rather than being pushed around by the weight of previous photographic incarnations (e.g. I’ve been to Lochan N-Ha’Achlaise three times but each time I’ve tried to avoid the cliche compositions). Then again, you could say that if you go to a famous place, you really have to use your own skill and style to create a picture that avoids saying what has already been said… I’m not averse to the rare or popular location as long as it has material that will allow me to be creative in.

Do you feel that the aim of your quest is to find the material that will allow you to express a particular style, or do you feel that the aim of your quest is to find the material that chimes with something inside you and then to represent it according to a style which suits it and your feelings towards it (a style which you effectively pull out of a catalogue)?

The aim of my quest is to create a consistent body of work rather than a ‘grab bag’ of opportunistic photographs. I don’t want to collect pictures of famous locations (which seems to be a common photography hobby). It’s great to go to a location that you’ve seen in print and it’s exciting if you can create something original from this. It’s also great to strike off on your own to find new grounds. I’m going on a Light and Land trip to the Gower peninsula soon at which we’ll visit very commonly photographed locations and I’m sure I’ll capture shots that are very reminiscent of other photographers. I also hope I’ll capture some pictures that present my transcription of those locales..

Click to view full post including 3 Comments
Thursday
31 January 2008
No Comments

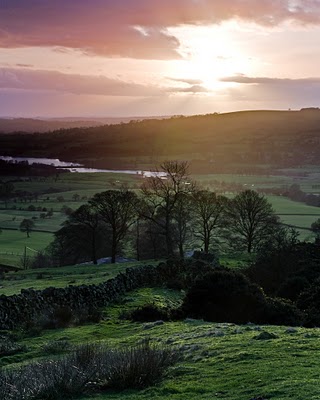
Polaroid in the Peaks

I was up at my parents house at the weekend and went out with my Dad to go for a photographic jaunt. I wanted to try out my new Polaroid back and type 79 film (colour 4×5) and also the new 360/500.

We went up to the Roaches, just past Leek, but the wind at the top was horrific and combined with the dense heather (tripod legs can’t get through to the ground) it was like taking a photograph on a bouncy castle. We retreated back towards lake Tittesworth and stopped at the foot of Hen Cloud just as the sun started descending. The whole of the sky was mostly overcast, dense cloud but there was a streak of clear on the horizon.

As soon as the sun struck this streak of clear we started shooting. The problem was that the band of light wasn’t lighting up the land and so we ended up using 5 stops of ND grad just to control the sun. This revealed the slight magenta colour cast of the Lee filters which was a little annoying. It also highlighted the need for a reverse grad (see the Singh Ray site for an explanation). I’ll possibly try out a singh ray 4 stop grad and 2 stop reverse grad at some point in the future.

The composition was satisfying though, but it needs a little work (dodge the top clouds, get rid of the flare spot at the bottom left).

I did take a Polaroid of this shot too. The dynamic range of the type 79 seems to be very close to Velvia (although it’s a 100asa). The colours are very yellowy though, almost like a old master – think constable effect. Working with Polaroid is mucky though (lots of ick everywhere – make sure you have a plastic bag for the crap and a safe place to put your pictures while they dry off – otherwise they’ll end up with a matt finish).

I didn’t manage to take proper large format shot (too much wind still) but did try out the 360 just to check how it focused in the field (very well).

Click to view full post including No Comments
Thursday
24 January 2008
No Comments

Ebony Adjustments

I’ve not talked much about the camera I’m using much recently so I thought I’d rectify that. At the moment, I take two cameras out to with me whenever I’m out, a Canon 5D which is modified to feel like a 4×5 rather than 3×2 (i.e. it has a custom mask over the prism and black masks over the LCD display) and uses a 24-105 lens (equivalent to a 96mm to 420mm large format lenses). This camera is used as a scouting and framing tool and also to get captures that I’m uncertain are worth spending £7 per shot. I still take care making sure these photographs are sharp and usable though.

If the shot is looking good, then the Ebony 45SU comes out. I am so happy with the Ebony 45SU that I have been forgiving it a couple of small foibles. Firstly the focusing rails can be a bit stiff. This exhibits itself worst when first racking out the front standard. When the standard is reaching full extension, it loosens off somewhat. The rear standard is stiff but not unacceptably so.

After looking around a few forums and asking a friend, Gerry Gavigan, about it; it turns out you can adjust the screws along the two plates that hold the rails down. I would strongly advise getting a good quality 0pt Pozidrive screwdriver so that you don’t damage the screw heads. I loosened off the screws that were closest to the front standard by about half a turn and everything got a lot better. There is a balance to be had however in that if you loosen it to an acceptable tightness when you are starting to open it, then it will be a little loose at full extension (which is when you need the rigidity most).

I would recommend a tension whereby you need to grip hard to start turning moving the standard which will mean that the tension is still grippy when fully extended (you don’t want the standards moving if you push against them for instance).

The other balance is that loosening the tension affects both front and back standards equally (at least when adjusting the ‘starting’ tension). It’s all a balancing act but I would be very careful not to rotate the screws more than half a turn. It might be a good idea to mark the ‘home’ rotation on the screw head and if you aren’t moveing more than half a turnlooser or quarter of a turn tighter you can always check to see how much each screw has been moved.

The other adjustment I’ve made to the Ebony is to add markings against the front and back standads so I can see how much rise/fall I’ve applied and also marked the inside of the backstandard to show rotation angle (at least for back tilt and for non-shifted swing).

Using the Canon 5D and Ebony 45SU together like this does mean significant extra weight but I feel it’s very useful for me to understand framing and perspective.. It also gives me more freedom to fine tune composition and tripod position so that when the Ebony is on the tripod, I only need to make small movements.

One of the tricks with a large format camera is to set up your picture and then fine tune the composition by using rise/fall and shift. This allows you to move up to 50% in each direction (with the right lens) and not to have to refocus or change the relative position of anything in the frame…

I’ll try to add a picture of the screw layout sometime soon

Click to view full post including No Comments
Thursday
24 January 2008
4 Comments

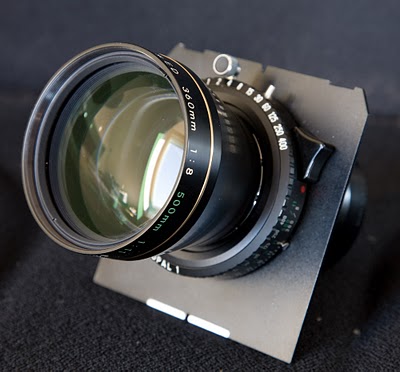
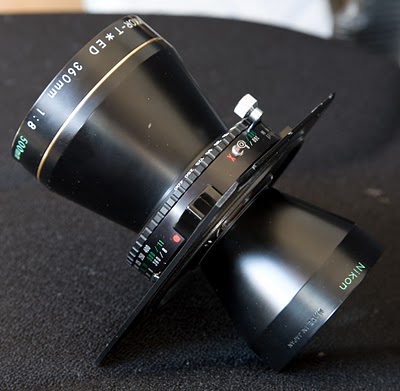
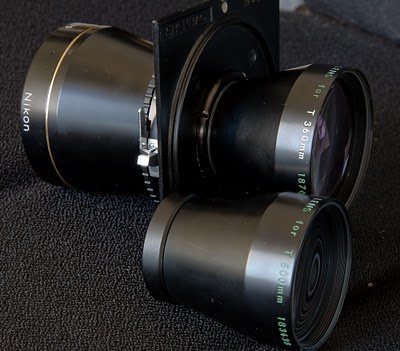
Nikkor 360/500 T-ED

When I started looking into the range of lenses to purchase for large format work (…and which lenses) I decided on a core of 80/110/150 (two Schneider Symmar XL’s and a Rodenstock Sironar S).

At the time I said that three lenses was more than enough to think about. Well it was but was still finding myself using the 24-105 as a finder and spotting shots at the top end (equivelent of 300-420mm large format). I acquired a Fujinon 240A which was recommended to me by many people (and seen online in the excellent Future Classics by Kerry Thalmann in which he reviews many modern lenses, some of which are now discontinued. One of the discontinued lenses that repeatedly gets attention, and more importantly that would work perfectly on my Ebony 45SU is the Nikkor 360 T-ED. This is a telephoto lens that has a Flange Focus (i.e. extension length for infinity focus) of 261mm (see the Lens Table on the Ebony site for details). This means that I can get reasonable near focus without maximum extension (about 2m close focus).

The 360 can also be adapted to a 500 with the replacement of the rear element. Even better for me, the rear element can be focused as close as 10m with the range of extension available on the Ebony.

The bad news is that they don’t come up for sale very often (especially not with the rear element). The good news is that one came up for sale on Ebay America for a reasonable price and I won the bid! The lens is in mint condition and although is f8/f11, is OK to focus in reasonable light.

I’ll be trying the lens out for the first time this weekend so it should be interesting. I think I’ll have to stop now as my bag is getting a bit heavy (although a super trekker does sound appealing – I’ll have to try David’s out next time I see him).

Click to view full post including 4 Comments
Tuesday
22 January 2008
2 Comments

Whitby – Too Much Sand?

Well it’s not the most productive start to the year as far as ‘luminous light’ is concerned but I’ve definitely been trying hard to get out and about..

Last week I went up to Sutton Bank with Charlotte to to see if the sun would make an appearance. Unfortunately that blasted horizon cloud made an appearance and the sun sank without a trace. Sutton bank was sort of interesting; I imagine the view is stunning in clear weather or with a slight haze and a good sunset, but it’s not the most inspiring of locations to try to find strong compositions in. I think I might be getting addicted to foreground; the though of having nothing in the picture closer than 100ft disturbs me for some reason.

Anyway, this weekend me and Charlotte went to Almscliffe Crag (a Yorkshire gritstone outcrop near Harrogate) in another attempt to catch the sun (rising this time) same news again though, although the cloud had moved over to the east this time..

So Yesterday I went out to Whitby to catch some geology, figuring the weather can’t ruin that for me..

Fortunately I was mostly right – although the rain did slow it down in places, holding an umbrella and using a large format camera don’t mix!

The surprise for me was that the sand was particularly high – probably a good 8inches or so higher than last time and over a foot and a half higher than when I first went. The surprise was heightened by the way that this totally changed the nature of the beach. The top of the beach now became very interesting; whereas before it was just a mess, now it had the sand framing it.

This also affected how long it took the water to reach the rocks – because the beach was higher, I got nearly an extra one hour before the tide came back in.

Also the bands of colour at the top of the beach were heightened by having a sand bank in front of them (and the composition was simplified too).

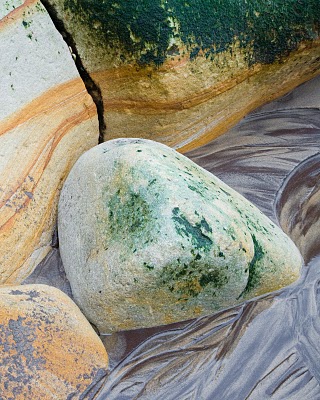
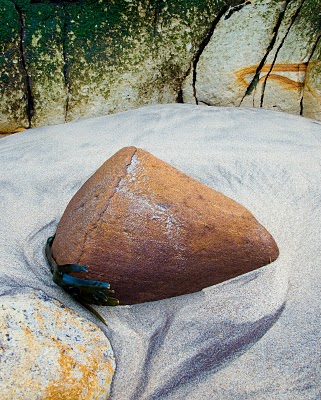
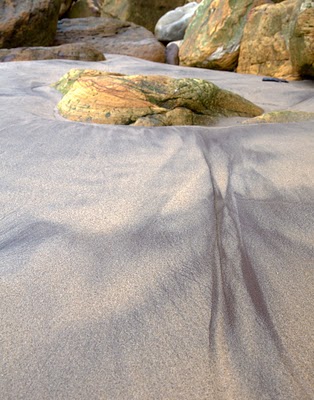
I particularly liked trying to find areas where the flow of the sand matched the flow of the layers of sandstone. The main picture was a wonderful find where the flow of layers in sandstone matched the rock that had nestled in the gap and mirrored the sand flow.

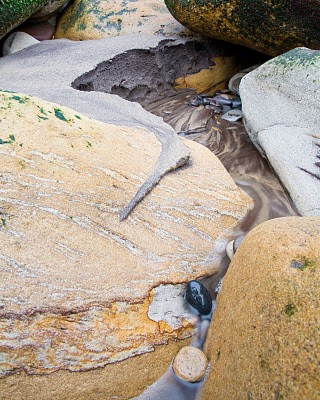
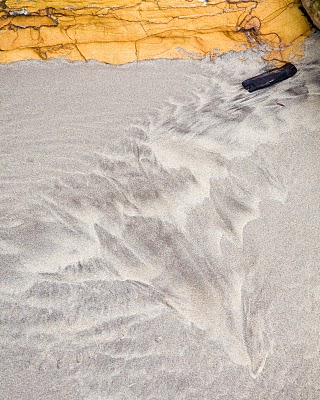
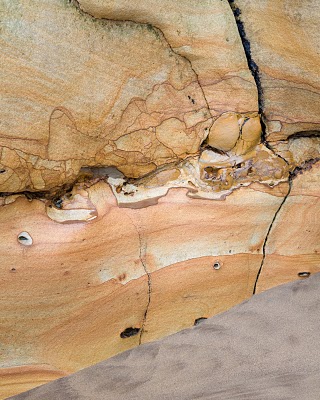
The second picture here was an attempt to find some simplicity in the complex flow of water through the rocks and sand at the head of the beach. Not sure if I succeeded here..

Click to view full post including 2 Comments
Tuesday
15 January 2008
No Comments

Peaky Moss – A Trip With Dav

After spending the previous afternoon at Sutton Bank, Charlotte went off to visit relatives and I went out into the Peak District to meet up with UniB (or Dav Thomas as he’s know by non geeks). We’d chatted online and were both learning about large format and I’d expressed an interest in seeing the peaks and also in having a ‘hunt’ together.

The day turned out pretty dire (nearly non stop rain) but the location was great (near Padley Gorge I think – I should find out really). I was particularly enamoured of the silver birch forests that had grown back over what was once quarry land.

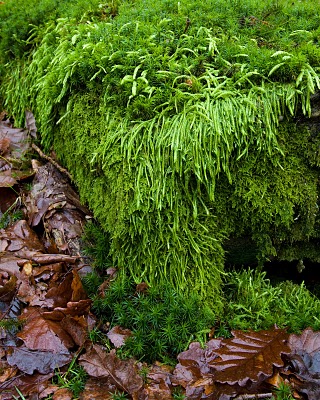
We stopped in the middle of an oak forest and in between chatting about cameras, photography, philosophy, websites, design, etc. We even managed to take a couple of shots. The moss was a winner in my eyes, so lush with the rain and so many varieties (species?). The top picture was very near Dav’s favourite dead tree stump and was just a rock completely covered by all sorts of bachytherms.. Getting the large format shot right was difficult because it was almost macro (0.9 bellow factor) and there was no obvious best plane of focus. In the end I went from the middle of the top of the rock to the middle of the front of the rock..

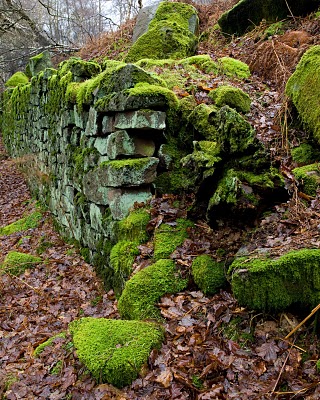
Later we found a wall that was crumbling and covered in lichen etc. The exposures were getting a little long at 2 minutes 40 seconds (reciprocity sucks) but hopefully the picture will be OK..

Click to view full post including No Comments
Wednesday
2 January 2008
3 Comments

Whitby Beach – Enough Water? Enough Sand?

There are two main projects I want to learn through during the first part of 2008. The first is the limestone pavements of the Yorkshire dales. These abstract stone structures satisfy a few requirements: geology, the process of change an flow, a large range of small, almost architectural structures and a beautiful but forbidding location. The second is the sandstone beach at Whitby. The beach satisfies the same criterion as above but also adds actual water flow, which if handled with subtelty can add a wonderful element of dynamism to a photograph.

Both projects are also minimise the requirement of dramatic light, for instance I don’t need to have wonderful coloured skies to show the shape of the limestone or the texture of the sandstone. This gives me the opportunity to work on a more flexible compositional level rather than questing for ‘the light’. Not that good light is not needed, it’s just the definition of good light changes.

Whitby has it’s own challenges though, the first I encountered was the mess that the beach gets into after people have walked their dogs and made a few sandcastles. My first trip to Whitby was at a very low tide as I didn’t know where the rocks were going to be revealed. Well the rocks are at the top of the beach and the low tide meant that they had suffered weeks of bipedal and quadrapedal stress.. This trip is only the second time I’ve been to Whitby and I wanted to make sure I at least started with a pristine beach. However, I didn’t know how high the tide had to be to clear the beach. The tide predicted (by Belfield’s Tide Plotter) for Sunday morning was 4.6m at 8.23am so we (my wife and I) decided to get to Whitby for about 8 to catch the sunrise (if there was one) and then to park up near the beach to see what level the tide was at. I was expecting the tide to be washing around the rocks where I wanted to shoot but was surprised to see the tide engulfing the small cave and completely covering the rocks I wanted to photograph.

I was also quite surprised to see a queue of people waiting to cross the beach even at 9am. It took until 11am until the tide was low enough to access the first lot of rocks without risk of getting water over the top of my boots when the surges came in. According to my tide table, this means that the tide level was approx 3.5 meters at the point where the beach started to become accessible.

At this point it was also the time when I would guess approx 60 people were queued up to walk about 15 dogs and 20 children. I did get a few photographs though.

The other thing that varies dramatically at Whitby is the amount of sand. This may sound a little strange for people not familiar with the coast but the sea can move hundreds of tons of sand over very short periods of time. When we went to Whitby last time, the peak tide was 5.2m and amazingly the level of the sand was about 30cm less.. This lower level of sand reveals some of the cleaner and more worn sandstone layers which gives more to look at. I’ve yet to work out when the best time to find this lowered level of sand is but from the evidence I have so far it’s during the large tidal ranges and also just after stormy weather.

Taking the photographs shown was also aided by the use of my home made ‘quick disk‘ which is a simple tool whereby you print out a page onto card and cut out a small disc and a small ruler. Place the ruler on your subject (against a rock for instance) and then measure it using your ruler on your ground glass. The scale on the ruler tells you your bellows factor.. Incredibly simple and sooo useful.

Click to view full post including 3 Comments
Friday
28 December 2007
No Comments

Soggy Rocks – Should I Stay or Should I Go?


I was determined to get out a couple of times over the holiday period and I mistakenly chose to be guided by the weather forecast (Metcheck in this case) and decided to go out on the Sunday morning instead of the Saturday morning (the one after christmas). The Saturday morning was supposed to be overcast, but not raining, but the Sunday was predicted as magnificent sunshine with a scattering of clouds.

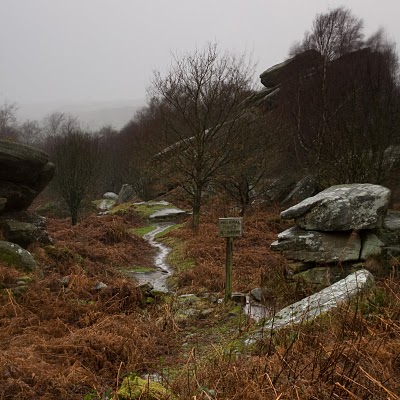
Things looked slightly awry when I woke up on Saturday morning to one of the best coloured sunrises I’ve seen in a long time and so I thought I’d give the day a go and wet out at 11am to Brimham Rocks near Harrogate. Upon arriving the sky was clear with some colour but some clouds were starting to show. I found a location that I hadn’t seen before and that showed some potential and setup my camera, as soon as the first photograph was taken with my SLR the clouds really rolled in. I thought about wandering around to look for other locations but I decided to change my usual approach and stuck it out for the long term, waiting for some interesting light.. How long could it take?!

After fifteen minutes, the real rain started to come down. Thankfully, I had a large flask of coffee and a windproof ultra large umbrella. I took a shot for the record just to show what it looked like (and to see what pouring rain looked like) which appears below…


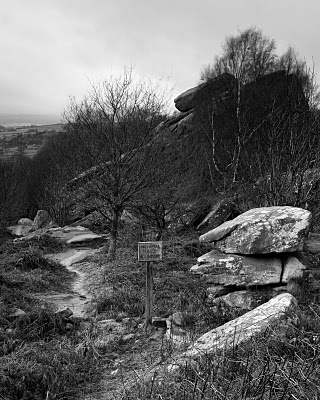
At this point, I could either give up or stick it out until either I got a shot or the light went (2 hours later). Two or three times I almost packed up but after just over an hour, I could see patches of light coming through. Nothing special but possibly enough to give some interest in the sky. The picture below is a black and white conversion at this point when some light crossed the foreground.

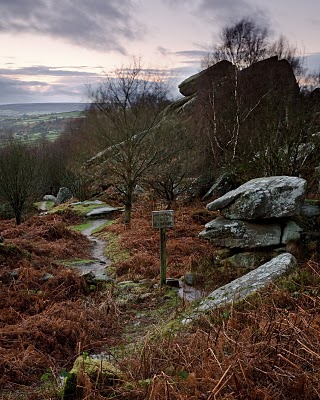
Another half an hour (and one point where I did actually pack up and start walking back) and I finally got some light that looked OK and took the picture at the top of this peice. Unfortunately, the light levels in the foregroun were very low and despite a 2 stop hard and 2 stop soft, I still had to merge a digital shot to get this picture. I did get one large format of the last picture so we’ll see what it does in due course.

One thing I have to say is that I know the picture I have is a lot better than the one I would have grabbed at the start. Whether I would have found anything better is another matter. I’m happy that I’ve done the subject some justice and I also know what sort of light I want to repeat the shot .

Click to view full post including No Comments