Still Developing

" A lot of my enjoyment of photography comes from learning. This is typically done through talking with others, reading books, magazine articles, blogs, etc. Part of the balance of having so much good information available (especially the writings that people make available for free online) is to contribute back by writing anything that I learn or experience. If you get something out of this great. If you care to comment to correct my many mistakes, I would greatly appreciate it. Landscape photography can be a lonely occupation but the conversations we have more than make up for that. "

Tuesday
2 March 2010
27 Comments

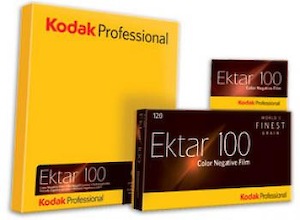
Kodak Ektar – The Best Negative Film, I’m Posititve

As I mentione din the last post, there have been a couple of nice bits of news for large format and film photographers recently and one of these was about a new film stock (Wow! Woop! Huzzah!) which is astonishing for many reasons, primarily just because some marketing department somewhere must have said “Well fell busines peeps, we should really address these 4×5 and 10×8 markets, we don’t want to miss out on all of that revenue and acclaim”. However, the big question is, “WHAT IS IT LIKE!!” – well, althoug the tests on the internet I’ve seen have shown that it scans very well (with as much resolution as Velvia for instance) a lot of people have asked about how it looks in comparison to Velvia, after all it is pitched as the most saturated negative film available.

Fortunately, Paul Mitchell has been taking a few example shots using his medium format camera as well as the equivalent Velvia shots. So, with a big thanks for Paul, here is my comparison.

Firstly, here is the Velvia shot of some Beech woods
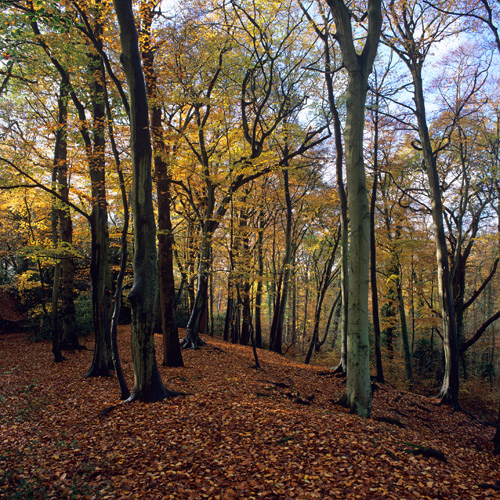
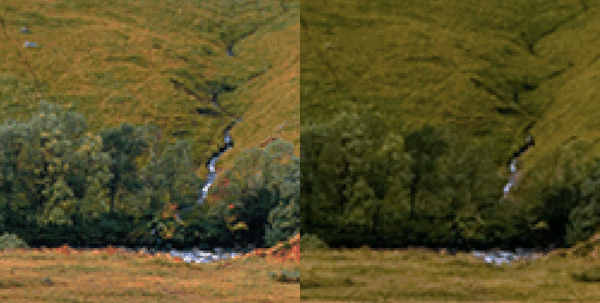
This is clearly what we would expect from a Velvia shot, warmth in the highlights, cold shadows and a wonderful separation of colour, especially in the greens to yellows (although this does look a little yellow/green to me).

The next shot is the Ektar processed using ColorNeg with it’s default Ektar settings.
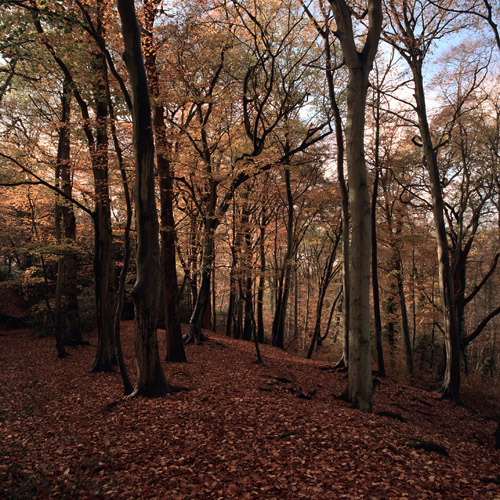
Wow! Warm indeed, this is a little bit over the top and also a little bit dull first we’ll up the saturation
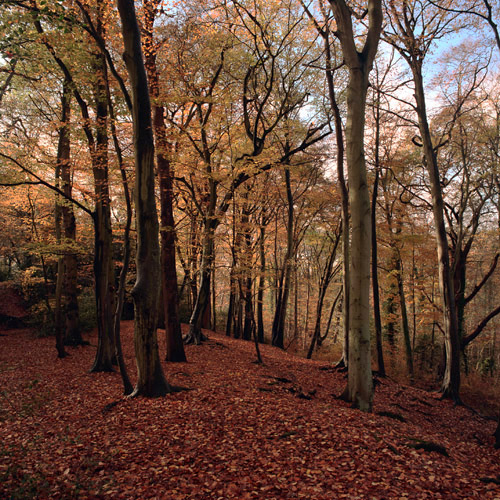
and then we’ll add a cooling filter (this is an 82 cooling filter)
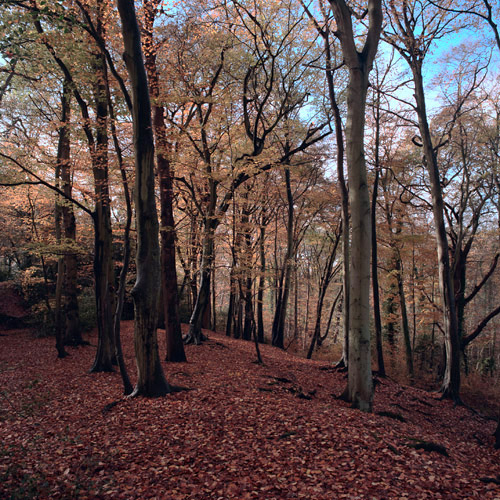
This is getting better but we could still do with removing a bit of magenta to separate things. I’ve also tweaked the sky colour that got shifted a little too much when applying the cooling filter. Ektar does seems to have a cyanic quality in it’s blues that may be a bit challenging – will have to play with some more shots before I can work out just what is going on.
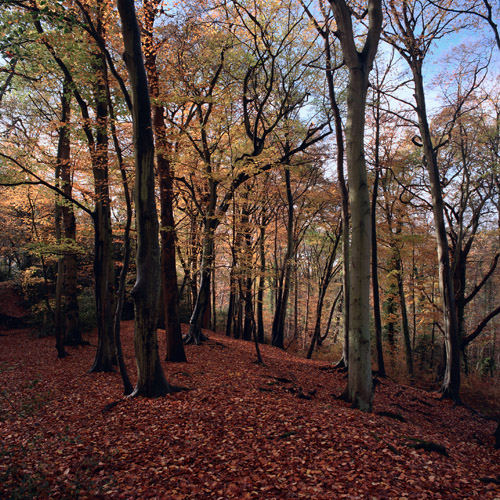
And this looks pretty good to me.. It’s got the saturation and the colour separation that transparency films such as velvia are well known for but with a nice boost in dynamic range.

Just as an experiement, lets see how if we can get it looking like velvia, just to see what happens. Firstly we need to give it more of a yellow/green cast (using a photo filter with a custom colour) and a final tweak to make things look like velvia is to cool down the shadows quite a lot (a surprising discovery whilst playing with digital and portra – more about that later).
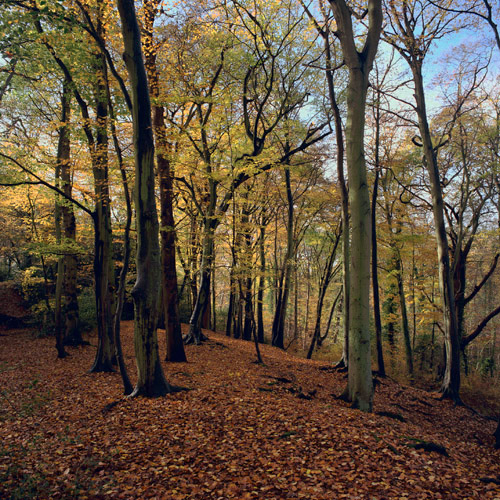
The results are a pretty close match. Closer than I could get working on a digital file and better than I could get when working with Portra. The natural saturation from Ektar, although coming with a strong warm cast, gives the film the punch that a lot of landscape photographers love.

I must admit, I’m quite taken with it and really look forward to playing with the film in 5×4 format.

In the meantime, here is a direct comparison between my modified velvia-like version and the actual velvia version

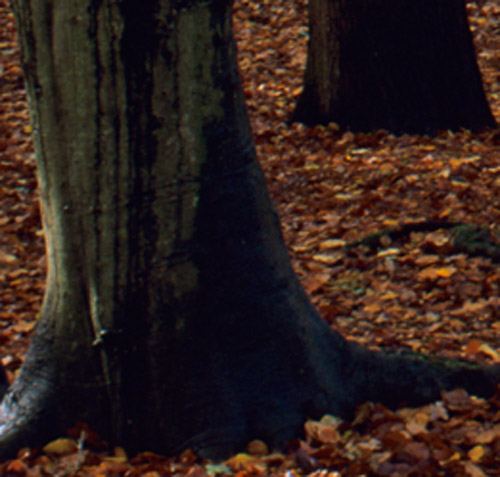
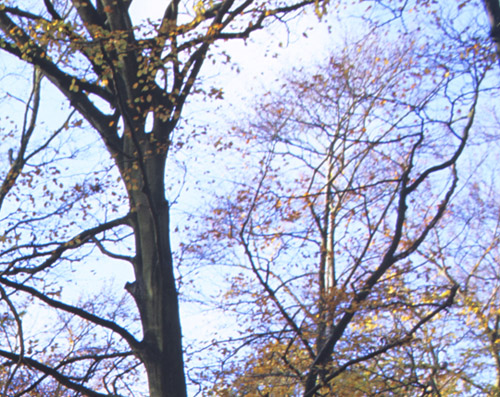
And I’ve been asked about highlight and shadow difference – I reckon there is another 1.5 to 2 stops of dynamic range but it also seems to handle the edges of highlight detail better too.. This doesn’t mean it’s perfect, but it does make it interesting, definitely.

I should point out that these shadow and highlight detal examples are not from the ‘velviafied’ image. They are from the step before I velviated the picture (I love creating new words).

Shadow (rollover for ektar)
Highlight (rollover for ektar)
A few people have said in the comments that Ektar doesn’t look like Velvia and I completely agree with them. It’s a different film and has it’s own natural palette. However, It does seem to be ‘malleable’ enough to get results that are not unlike some of the punchier transparency films. I hope velvia will be around for a long time, in a lot of circumstances it’s absolutely beautiful. In other circumstances it’s a complete pain to work with. Ektar offers a new film stock that is more like what many photographers desire in a film than other negative stock and, for those photographers that can cope without the exact rendering properties of Velvia, it’s nice to know that there is another potential option.

I’m going to be playing with the film some more but I’m definitely not going to be leaving my velvia at home. (This article was never intended to try to line Ektar up as a replacement for Velvia – the main goal was to show people who are used to Velvia how Ektar differs and how ‘malleable’ it is.

Oh – I was going to mention one of the ‘discoveries’ I made whilst playing with the comparisons between velvia and ektar. One of velvia’s key features that makes it easily recognisable is it’s very cool shadows. Nearly all other films have warm or neutral shadows (e.g. Astia’s shadows tend to magenta/red) but if you examine a few velvia transparencies, you see a consistent shift to blue as you get into the denser blacks. This adds to the separation of colours in a picture as most pictures tend to be warmer in the highlights. I haven’t played with this discovery much but applying it to a few digital files had some interesting, and quite attractive, consequences

A few other links to Ektar stuff: –

Click to view full post including 27 Comments

system asset

Thursday
25 February 2010
7 Comments

A Silver (halide) Lining

it’s been a few weeks since I made a blog post, I’ve been caught up in building websites, learning about video, and also suffering from the general malaise that seems to come at this time of year. However, this does not mean that I have had no ideas for blog posts. Quite the contrary, it seems the less I blog, the more ideas I have. Anyway, I’m hoping to rectify this so here goes with the first one.

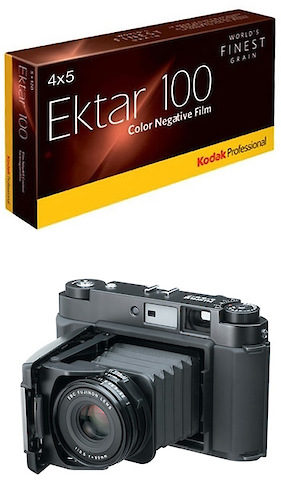
My last few blog posts included lots of talk about the discontinuation of Quickload and the end of large format and film photography as we know it. However, there have been quite a few small bits of news that have reassured me that film photography and large format will be around for some time. Firstly, Fuji have announced a new film camera; the Fuji GF670 is a medium format, fixed lens rangefinder (an 80 mm prime lens) which allows photographs to be taken either as squares or as 67 (actually 4X5 ratio). Whilst this does not have any implications for large format photography, it does show that Fuji have a continued interest in film photography (probably).

The second, and for me more important piece of news is that Kodak have released a new film in 4X5 and 8X10 formats. Kodak Ektar 100 is a negative film, supposedly very similar to Kodak Portra but with more saturation than Portra VC and better scanning capabilities. The announcement of the film itself isn’t particularly important, what is important is that it signifies Kodak’s continuing interest in the large format market.

Between these two pieces of news, we have a strong indication that film will be around for some time to come and that at least one of the major film producers still has a continuing interest in large format. And I suppose one of the good side effects of the discontinuation of Quickload is that more people can now use sheet films such as the new Ektar, Portra and other films (and for a substantially cheaper price than Quickload).

I have also been buying various bits of new photographic equipment. The main item being a Panasonic GH1, a micro-4/3 camera with excellent video capability. I have the new RF 75 Lee filter Kit also which has so far worked very well indeed. One thing to bear in mind with the Lee RF 75 system, is that the hard grads are very hard indeed; I would recommend purchasing a soft grad as well. I have also bought a PhotoBackpacker rucksack which so far has proved a lot better than carrying heavy loads. I will try to write a review of these new items over the next week.

Oh, and I’ve also been playing with speech to text converters (Dragon Naturally Speaking) which is taking this blog down as I speak it at (almost) full speed. Definitely faster than I can type anyway.

Finally, I’d like to take the opportunity to tell people that the large format workshop in April is nearly sold out, there are only a few places left so if you are interested I would recommend booking now. Myself and Dav have spent some time putting together a small video to promote the workshops which I’m editing this week. Working with video content is a whole new ballgame but one which I am trying nonetheless. I will probably write a short blog post about the video production at some point, although it might not be interesting to many people, it might help me remember what the hell I’ve done from one day to the next. My phone off and then thealt. you an hour of work okay until you how much else at my sister’s (heh… don’t leave the speech conversion on when you are on the phone!!)

p.s. Found a comparison of Ektar 100 and Velvia 50 here

Click to view full post including 7 Comments

system asset

Wednesday
27 January 2010
11 Comments

So what does the ipad mean..

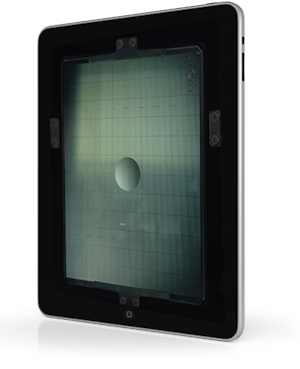
So what does the iPad mean for photography? Well to begin with, pretty much nothing. There are hardly any quick wins for the platform over the iphone. It really is just a bigger, more powerful iphone. There are the obvious content creation and payment opportunities (witness the repurposing of so much content for the iphone) but beyond this, why does the form factor and interface matter?

That screen real estate and portability does make me wonder, how long will it be until the iphone/ipod is targeted by a camera manufacturer as an external preview device? At the moment the Canon 5Dmk2 (for instance) has a HDMI output that will show live view in HD. Unfortunately it doesn’t show the HD view when recording but this problem was fixed on the recent 7D which shows Canon are paying attention to this feature.

Let me put together a small ‘upgrade’ scenario for the iphone/ipad and newer cameras. The first is a way of getting video out of the camera and into the iphone/ipad. There are a few ways to do this, HDMI being the first but we’re unlikely to see a HDMI in on an iphone/ipad. Next is wifi, which sounds like a distinct possibility as we’re seeing many wifi enabled cameras and we know the iphone/ipad has it. Wifi would be OK to show compressed video with current hardware but it would be good to use something like ‘transferjet’ – high bandwith wireless at short distances – which would probably manage uncompressed HD. However, just wifi will do for most uses.

So how does wifi help? Will, imagine a point and click, touch screen preview for your camera. Set up a composition and control focus, aperture, multi-shot, etc .. everything from your iphone or ipod. You could also use pinching to zoom in to check focus (which would be great with tilt/shift lenses).

More importantly for a lot of photography where full tethering is difficult and laptop unfriendly, composing and managing photos on a 10″ screen would be a boon and the ip*d should be powerul enough to apply some photoshoppery, live in the field. For instance, you could apply a grad onto the scene and the camera could take multiple shots and blend them as a preview! You could also include ‘peaking’ on preview to show in and out of focus areas (peaking is a videography originated concept where in focus areas blink or have a zebra pattern).

The two main things are that a bigger viewfinder on a camera is better but over the 3-4″ currently, they just don’t make sense. An ipod or ipad could act as a temporary, portable and highly functional external screen with the added attraction of ‘consumer’ developed interfaces. The democratising of the camera viewfinder could help extend the instant feedback facility of digital cameras to the point where a view of the picture as large as a 5×7 ground glass, an interesting thought..

Click to view full post including 11 Comments

system asset

Monday
11 January 2010
28 Comments

Large Format Photography Workshops – Peak District

With some of the concern about the future of film raised in association
with the discontinuation of Fuji quickload* it may come as a surprise
that Dav Thomas and I are starting a set of large format photography
workshops. Dav contacted me at the end of last year, asking if I was
interested in these and my immediate answer was yes. Dav is a great
photographer who is very knowledgeable about all things large format and
also is a great, artistic photographer. And if Dav thinks I have enough
to offer people who wish to start or extend their large format
experience and who am I to argue! I’ll blow my own trumpet a bit anyway
and say that although I arguably over analyse things in my blog at
times, this does mean that I have a good grounding in most aspects of
large format, which I can probably summarise by saying that I’ve done
the obsessive compulsive shitty, geeky work so that you don’t have to!

We’re offering a weekend course and a one day course with a couple of
‘advanced’ courses later in the year. Our one day ‘introduction to large
format’ course will allow anyone to come and get a taste of large format
as we can supply all of the equipment you will need to try it out. We
even supply you with some film and, if time permits, we develop it on
site so you can see what you’ve taken. The first course is a weekend in
the Peak District based at the Devonshire arms hotel in Baslow right in the heart of the Peak District where we’ll be giving an
introduction to large format that will hopefully give you all the
foundations you need to develop your own style of photography.

Our weekend course isn’t just for beginners either! Dav and I will be
running through many techniques and approaches that you may be
unfamiliar with and will definitely have a few tips that you’ll find
useful (unless you are Joe Cornish or David Ward, in which case you
aren’t allowed on the course because you’ll make us both a little
nervous. Sorry Joe/David!). We will also be spending a lot of time out
and about, so you will get some one to one tuition on whatever
aspects of large format you think needs the most attention.

If you are interested in what all of this large format stuff is about,
or just want to brush up on your craft, join us for a unique
photographic experience. You’ll come away with a few transparencies of
your own and also an idea of the processes that help large format
photographers produce the work they do. Take a look at…

Peak Workshops – Large Format Landscape Photography in the Peak
District

Part of the workshops will be a continuously building set of extensive
notes on some of the issues and techniques that are useful for a large
format photographer. Some extracts from these will be posted here and on
the workshop website as time goes on. If you are interested, sign up for
the newsletter or even book on a course!

And don’t be afraid about film being discontinued! Film is currently a
multi-billion dollar industry (even I was surprised at how large the
market still was), very unlikely to dissapear in the next decade.

I hope to see a few of my blogs readers over the next year at the
workshops and have a chance to show them another side of landscape
photography.

  • The lack of quickload is not necessarily a bad thing. Sheet film is
    cheaper, more environmentally friendly and is actually lighter that
    quickload if you are happy to change film in the field. The only
    situation it might make more difficult is if you find yourself wanting
    to take 20 sheets of film on a single outing where you can’t get back to
    the car. The other good news is that we’ll be using sheet film and
    grafmatic backs during the course and will show you how to use them and
    reload them (time permitting on the one day intensive) and how to avoid
    common problems.

  • I should also add that I am seriously dissapointed with Fuji UK’s
    recent post on their commercial website stating that the may delivery of
    quickload will be the last ever, despite their statement that stocks are
    expected to last until the end of the year. If you want quickload film
    now, you have to book it by paying a deposit of £10 on the Fuji website.
    The page states “Out of stock until April/May 2010. All orders will be
    placed on a waiting list. This delivery will be the FINAL batch of
    Velvia 50 Quickload, as it is being discontinued. “.

Click to view full post including 28 Comments

system asset

Thursday
7 January 2010
7 Comments

Content Aware Fill

Just a quick update today. I spotted an update about the new Adobe Photoshop CS5 that may be coming out this year and they’ve look like they may have something for both we general landscape photographers and also film photographers in particular. The last release of PS had a feature called ‘content aware scale’ which allowed you to expand or contract areas of a picture whilst keeping detail in proportion (it worked out the areas of the picture that could be removed without distorting the picture). At the time I looked at the SIGGRAPH papers to see what the technology was behind it and was interested to see an application where they could ‘fill’ a patch of a picture with areas around it, a turbo charged spot heal brush! It looks like Adobe have been playing with this and added a few new features because we may finally have the tool that will make spotting transparencies and negatives a joy instead of a pain. Also, for those whose morals don’t stretch far enough to restrain them from a bit of sleight of hand, the content aware fill and ‘patch match’ will allow you to easily remove large areas of a picture (an annoying alligator perhaps? or an incredibly irritating ibex?). Have a look at the video below and prepare your wallet (It only seems like last week I bought CS4!)

Click to view full post including 7 Comments

system asset

Tuesday
5 January 2010
12 Comments

Fear and the New Year

I’ve had quite a long break from photography (compared with many of the people I know and taking into account that it’s somewhat of an obsession of mine) and our plan to go out on New Years day was my way of ‘breaking in’ my new dedication to the cause. However, I must admit to a certain trepidation – a fear if you will. You see it doesn’t take me long to start doubting I can take a good picture. Given a couple of weeks away from photography and I’m uncertain whether the pictures I’ve previously taken were flukes (or were even that good in the first place) and then I look at other people’s work and the prodigious volume of work that my colleagues produce and I get distinctly concerned. I know it’s said that fear is a part of photography but it doesn’t help knowing that.

What I have to remind myself of is that fear is what drives us onward; it’s the fuel for our desire to progress. I also fear whether I’m going to enjoy being out and about, I’m a bit of a hermit at the best of times, working from home doesn’t help, and the motivation to get out and about sometimes evaporates.

It often doesn’t get better when you get to a location, where the light is doing the most amazing things and I’m stuck with a visual case of writers block. Those first moments (hours?) of wandering around almost aimlessly, mumbling under your breath – “No.. no that won’t do .. bugger .. nope .. aha, er, nope.. ” – are strikingly polar. Such amazing things going on around you and you’re wandering around like an intoxicated llama. However! At some point you start to see some shapes; lines forming as you move the camera; curves aligning; shapes meshing. Even if the picture isn’t there, you can feel your brain starting to get a grasp of your surroundings; the tetris puzzle that is nature, in lockstep with your movements. After a few ‘nearly’s you find a picture that you think might just work and it’s time to get down to business.

At this point in time you don’t have chance to worry as it’s mind in overtime – “How do I pull this together in the best possible way? Will the light work to my advantage?” – and once these compositional puzzles come together, the craft of photography takes over and it’s waiting, waiting for the right moment to trip the shutter – one more, just one more – and then we’re all done. And then the worry comes back – “well it wasn’t that great, it will do though” – and as you walk away, you look over your shoulder and see another variation and the light changes again and your conflicted again. But I find some other opportunities, repeat the pattern – occasionally I get a picture where you know it’s going to be good but then I worry so much about whether I’ve done it justice.

And then I’m home and, if you’re using digital as a main camera or a snapshot camera, you can check what you’ve got – and for me it never looks quite as I’d wanted – I might get a couple of pictures that look ok but I typically look at them and I’m a little deflated. The pictures then have to grow on me again. I’ll quickly use lightroom to pull things together a little bit and pick out a few that at least show some of the ideas I’ve had and then I’ll put them away. At some point I’ll dig them out again, a few days later possibly, and it’s only then I start to look at them and go – “You know what, a couple of them are OK! Not great but they show promise..” – and possibly I’ll have a single image where I go – “Wow! I nailed that one!” – not often, but then I do get one it makes everything worthwhile. Those few images (I think I might have for six or seven this year – see here for my top 12 of the year) are the icing on the cake though. The search for those pictures, despite the stress, is the buzz – the excitment, the stress is part of the fun – a challenge to find, to construct, to express ideas, art, beauty, whatever. It’s the pleasure of solving a puzzle, of creating art, of enjoying the landscape. However, once you have those six or seven images, you’ve just set yourself a new standard and the worry has new references.

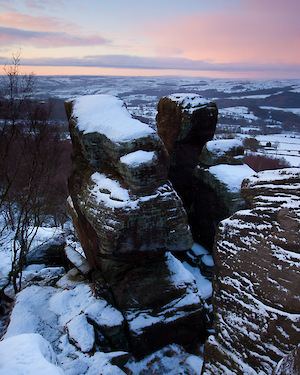
But for New Year, I got out to take some pictures, and with my wife Charlotte too! Despite having ‘seeing’ problems, I took some pictures and I’m quite happy with a couple. As part of an upcoming project, I’m trying to use the camera to record my ‘potential’ compositions and to get more ‘representative’ photos of the environment. To this extent, I’ve posted my favourite three pictures of the day and also uploaded a small gallery to picasaweb. I got a couple of these as large format pictures, the one posted on the right is one, can you guess which is the other one? Which would you have chosen?

My Brimham Rocks, New Year Photoset

Click to view full post including 12 Comments

system asset

Monday
4 January 2010
12 Comments

My Landscape Photography Tips for 2010

Here are a few of my suggestions to make some improvements in your landscape photography for the start of 2010. These are also points that I’m paying attention to so I’ll tell you how I get on with them too,

1) Work the whole composition

It’s often said that we should include some foreground interest in our pictures. If we take this by ‘rote’, we will end up with a cliched rock or tree or branch in the front of the picture. The idea behind the foreground interest is to give the viewers eye something else to focus on to help their eye move around the picture. Try looking at your composition as just a set of simple shapes, reducing them to their core elements. Many of the best pictures can be ‘summarised by four or five lines, curves or points. Graphically strong compositions become memorable.

2) Walking further doesn’t make a better picture

Many of the pictures that we like were taken on special trips or were ones where we had to walk a long way or wait a long time to get that picture. Viewers don’t care about this though, all they see is the moment you tripped the shutter. If you are after ‘vistas’ though, you have to walk a long way to change the view and so it’s sometimes essential. My personal taste is for ‘medium distance’ vistas because you don’t have to walk as far and you have much more control over the composition (i.e. to change the composition you don’t have to walk half a mile).

3) Spend more time looking and taking pictures

If you have four hours at a location, don’t spend all of those hours pressing the shutter. You should spend at least 3 hours looking around for interesting shapes and textures and then choose the most interesting thing to take your picture of. You will hopefully end up with 3 or 4 pictures where you had spent an hour each working on them rather than 3 or 4 hundred pictures where you had spent 30 seconds each. Which do you think would be better.

4) Don’t look for subjects; look for colours, textures, shapes and lines

I get caught in a mental trap sometimes where I see a really interesting subject, a dead tree or a waterfall or rock formation, and spend ages trying to build a photograph around it. At the end of the day, great photographs are a balance of subject, shape, texture, form, etc. You don’t need to have the best subject in front of you to get the best picture. Spend more time looking at the top 10 subjects and finding how they balance and combine together. You may find a composition which includes numbers 5, 8 and 9 in your top ten subjects but put together make a number one composition. (and a photographic super group of some sort I suppose)

5) Only put your camera on the tripod at the last minute.

I see a lot of people with their camera permanently attached to their tripod. Take it off and give yourself more flexibility when you are looking for your best compositions. Only put the camera on the tripod when you know you have something really worth it in front of you.

6) When you browse photo books or websites, ask yourself why you like or dislike each picture

I’ve learned more from analysing my own likes and dislikes and critiqueing my favourite photographers pictures than through any other method. Creatively analysing the flow of energy in a picture and why some pictures don’t flow well will help you do the same thing with your own pictures when out in the field

7) Use a different raw converter

Many of the standard raw converters give unsatisfactory colour reproduction and poor colour clarity. Try out Raw Developer or Capture One to give you a differnt take on the colour reproduction of your camera.

8) Use Film!

Go on, buy a cheap 35mm or medium format camera and put a few rolls of film through it. Just having a look at the colour reproduction can give you a good feel for how to realistically post process your own digital pictures.

9) Try limiting your widest lens to 24mm (or just use 24mm only)

The use of super wide angle lenses is becoming almost like a special effect and although in moderation they can inject dynamism into a picture, I think the use of a 24mm lens is the ‘butter zone’ where the view looks open without looking overly wide. Composing with this focal length isn’t as easy as with super wides but spending some time getting photos working at this focal length will then help you when you got back to your super wides.

10) Take multiple photographs of a single location as the light changes

In order to learn more about the light, find a composition on a day with patchy sun (i.e. not a clear blue sky day or a fully overcast day) and take photographs every minute or so for 20 to 30 minutes. When you get these photographs back, work out which ones you like and which ones you don’t and ask yourself why. You will learn a lot about when to press the trigger from a couple of runs at this exercise.

Click to view full post including 12 Comments

.

Sunday
3 January 2010
10 Comments

My Virtual Landscape Photography Bookshelf

I’m a book addict. I can’t help it, I know I should resist it but whenever I see a photography book that looks halfway decent I have an overwhelming urge to own it. I suppose it’s because, in my opinion, photo books are the most effective way of disseminating photography and the pleasure to be had from sitting down and browsing a good photobook is unique. Viewing photographs in a gallery is obviously better in some ways, but I find it difficult to absorb pictures when viewed over a short period of time. I like to absorb my favourite pictures; sit down with them again and again; view them as my tastes change. As much as Joe Cornish’s gallery is an excellent visit (and highly recommended) it still only has a set amount of pictures. If you own First Light, Scotland’s Coast and Scotland’s Mountains then you have nearly 300 of Joe’s best pictures and can ‘dip’ into them at any time you want. As for photographers like Christopher Burkett, Jack Dykinga, Paul Wakefield, etc. We stand little chance of seeing his ‘original’ pictures and the only way we can absorb them is through their books. As such, my bookshelves are the best gallery in the world and I spend an awful lot of time in there.

So my book reviews are a chance for me to share the location of these galleries for your pleasure. However, I can only review so many books at a time and I thought you might be interested in seeing what is on my shelves. The following link is to my ‘virtual bookshelf’ at Shelfari. I use it so that I don’t end up buying the same book twice (when you are buying from second hand websites, different editions can sometimes even have second names) and also to remind myself who I’ve lent books to. As the days of 2010 go on, I’ll try to include reviews of many of these books. In the meantime, anything with four or five stars is very recommended reading.

My Landscape Photography Bookshelf

Shelfari: Book reviews on your book blog
Click to view full post including 10 Comments

.

Tuesday
29 December 2009
12 Comments

Colour & Digital vs Film Resolution

Whenever digital photographers talk about large format, they end up getting obsessed about resolution. Most large format photographers know that this isn’t the main reason the large format experience is so enticing (i.e. perspective and focal plane control, the huge view, the luscious nature of film, etc) but being as it gets talked about so wrongly in so many places, I thought I’d get my own geeky view in. First of all let’s review some of the existing literature on the subject.

Probably the best known is Mr Reichman’s Luminous Landscape essay on the subject, where he compares a medium format camera with a Canon 1Ds, 11Mp, with a Pentax 67. He comes to the conclusion that the 11Mp camera has equivalent if not greater resolution than the digital. Well Michael gets a few things wrong, the most basic of which is effectively down sampling the medium format image to match the resolution of the DSLR.. duh! If you want a rough idea of where he’s going wrong, compare the images where he looks at noise content, you’ll see the reflections are more details and the edges of the window frames show 3d modelling, not blurred anti-aliasing. And this wasn’t using a drum scanner or medium format hires scanner (like a Nikon).

Moving on to someone who appreciates film and digital, hopefully who has a non-biased viewpoint, Ken Rockwell has an excellent article. Ken quotes a 25Mp count for 35mm film but having looked the Clarkvision website who has an enormous amount of information on the subject, it seems that 15Mp is about the limit for line resolution, read more about the capabilities of large format here. The surface area of 35mm film is 864mm2, 645 film is 2090mm2, 6×7 is 3920mm2 and finally 4×5 is 11520mm2 … This makes the scaling factor for 645 is 2.4x, 6×7 is 8.4x and finally 4×5 is 13.3x. So according to the very thorough research by Mr Clark, we should need 199Mp in order to reach the ultimate limit of high resolution slide film. However, bear in mind that various other aspects of the imaging chain mean that this ultimate resolution for 4×5 isn’t quite acheivable.

Charles Cramer does a comparison of 4×5 and a 39Mp digital back on the luminous landscape website where he says that a P45 ‘almost’ equals 4×5. However, his definition of almost isn’t quite almost the same as my almost definition. Take a look at the close up leaf comparison and look at the vein patterns and also look at the texture of the wall in the background. This difference looks to be more than just the difference between maybe 39Mp and 42Mp. It looks to me like the difference between 39Mp and 80Mp or more.

The problem with comparing film and digital is that they are effectively doing two completely different things. To understand why we need to know a little bit about how digital works. Each pixel in a digital camera can only be green blue or red. i.e. the pixels are essentially monochrome. The colour information comes from the fact that the pixels are distributed around the sensor in different colours and ‘clever’ algorithms try to work out the missing information. Below is an example of a bayer array (the name of the sensor pattern that is used in most cameras). Every four pixels has a block of two greens, a red and a blue pixel. The reason for two green pixel is because it was worked out that most textural, luminosity information can be worked out from green data and the colour information can be interpolated from the red and blue data (here for examples). This is pretty cool, it means that for each square of four pixels, you can work out the luminosity resolution using two of them and the colour information from the remainder. Oh! Hang on! That means that you only have half of the pixel count to work out the luminance data and only enough information for accurate colour every four pixels. So a 16Mp is actually an 8Mp luminosity camera combined with a 4Mp hue camera. But digital cameras look like they have more resolution than this! Well, sort of. RAW conversion software then uses various edge detection algorithms to try to increase the apparent resolution. So you probably get some symptoms of a 14Mp camera, maybe the occasional edge that looks like a 16Mp camera but mostly probably a 10-12 Mp camera. So perhaps digital does have some resolution after all. Well… no. What is effectively happening here is digital upsampling. You can apply this sort of edge detection and upsampling to a film shot just too.

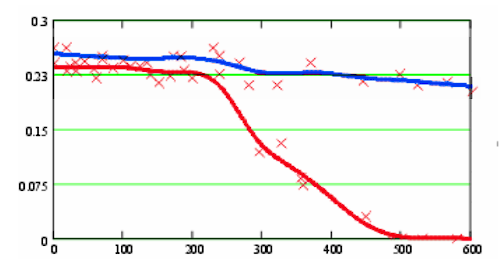
A thorough paper from the Stiftung Warentest institute measured the colour resolution response (effectively separating out the saturation component of the picture and working out it’s resolution) and produced the following graph showing how colour resolution falls as the frequency of detail increases. The blue line shows a foveon sensor (which works like film) and the red line shows a bayer mosaic’ed sensor. As you can see, the camera has a half of the linear resolution of the film/foveon equivalent. This equates to a quarter of the number of pixels. You can see the full paper here

system asset

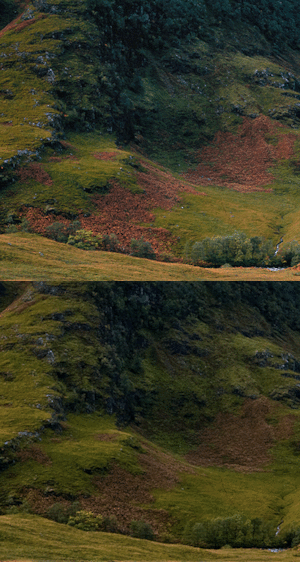
What is very important about that last paragraph, and something that is often missed when looking at comparisons like this, is that the colour resolution of a digital camera is only half of the luminosity resolution. For most instances, this doesn’t matter as the ‘upsampling’ algorithm uses all sorts of cleverness to make sure colour ‘looks’ good. However, it does show up along colour edges and also, most importantly for landscape photography, in high frequency colour details, i.e. colour texture. For example, a distant field of grass and flowers or the tecture of moss on wood. The colour of leaves in an autumn tree, etc., etc. How does this lack of colour resolution affect real world photographs? Well, a good example is in this show below where we compare a 5×4 large format transparency with 5D file. Now I’m not comparing resolution here, the 4×5 transparency is way, way better than the digital so for these purposes the 4×5 is equivalent to the ‘real world’ view.

system asset

This is a pretty extreme example and I plan to do some further tests to see how this effects some more modern cameras (hopefully a test of a phase one back against a large format transparency at some point). Anyway, how does this lack of colour resolution translate into real world landscape photography. Well, for one, don’t expect very fine colour texture to appear correctly in digital images. If you do have fine texture, you will have to live with the fact that your pictures won’t blow up as well as they might otherwise.

As far as how many megapixels does a colour large format transparency have? Well, if we’re looking at a ‘digital friendly’ picture, probably around 80Mp for the typical shot, possibly 100+Mp with a good lens and great technique. With a highly textural picture, we could be talking about 180+Mp. This probably means that for an Imacon scan of a large format transparency, you probably have around 50Mp ish (but lacking in some colour detail).

We can also learn a little from the work at the Gigapixl Project who worked out a couple of things (along with an estimate of 12Mp as the equivalent of a 35mm picture), one of which was that 360dpi is the maximum a typical human can resolve in print. This is handy as it gives us an ‘optimum, eye resolution limited’ print size for various sources. The Imacon scanned print is optimum when printed at 17×21 inches.. which is pretty handy given the size of most affordable printers! But it also means that if you get a good transparency and drum scan it, you can get an eye resolution limited print of 20×25 inches. Of course, we’ve also learned that digital cameras, ‘cheat’ to get a better resolution and it ‘works’ fairly well. So we can do the same with our digital prints to get an increase in maybe 30% linear resolution (for ‘most’ pictures where things like ‘edge detection’ can work).

This post will be continued when I get a chance to play with a digital back… :-) Let me know if you’ve learned anything from this or if you think I’ve missed something.
UPDATE: A good example of raw comparisons and how they go wrong here and here

UPDATE: Ian Scovell has pointed me towards an excellent film comparison with digital on Marco Boeringa’s website which supports the 15+ Mp for a 35mm transparency idea – possibly even more.

UPDATE: I found a good example of the difference between pixel level resolution and bayer array resolution at the Foveon website. Foveon uses a technology where each pixel records all three components. The comparison is here and the background on Foveon is here

UPDATE: Another example for a Luminous Landscape reader that falls into the trap if testing monochromatic, line images where raw converters and bayer sensors are at their best here

UPDATE: A great example of the resolution capabilities of a film camera here. 35mm vs digital M7 vs M9 using Spur Nano Edge black and white film here

Click to view full post including 12 Comments

system asset

Tuesday
22 December 2009
19 Comments

Fuji Quickload and Large Format Film Availability

As posted previously, the discontinuation of quickload is a blow to large format photographers but is it “the beginning of the end”? Well I don’t think so and hopefully I can articulate a few reasons why.

Fuji as a company have made vast losses recently and this has been reflected in share prices. In order to respond to shareholder pressure, FujiFilm have declared that they ..

To this end, beginning with the current fiscal year, to build a robust corporate constitution, the Company is resolutely implementing concentrated structural reforms and thoroughly implementing measures to reduce costs and expenses throughout the entire Group and in all businesses without excluding any business fields from the scope of these measures

Fuji’s losses in the Color Film subdivision were nearly 40% and I have a feeling that ‘without excluding any business fields’ is probably to do with the ‘Film’ in fujifilm having ‘extraordinary protection’ within the business. However, film as a whole is a huge revenue earner for the business (£1 billion dollars! Excluding the colour paper part of the business) and so as a whole, film will most definitely remain alive.

However, each subdivision of the company will have been asked to make cuts somewhere that will reduce overheads and anything that doesn’t make a big part of that £1bn will need looking at. One of Fuji’s other stated aims is to move production over to China where possible. If this is the case for film production, consolidating suppliers, inventory equipment, storage space, employee salaries, etc. will be a strong contender for consolidation.

Compared with this, the production of sheet film is a minor job of slicing up some sheets and packaging. Even if Fuji were to decide that they couldn’t manage to cut film to size, an agent may be able to purchase raw sheet film and cut it themselves. Not a technically complex task and not something that requires a huge equipment investment. In contrast, the production of quickloads have a significant equipment overhead and custom manufacturing and materials input.

My guess this that we will see consolidation of film lines before we see consolidation of film sizes (maybe this was demonstrated when velvia 50 was discontinued even when quickload was still alive and kicking). So we may see Pro160S discontinued before we see 4×5 sheet film become unavailable.

Click to view full post including 19 Comments

.